#Getting Started
This guide walks through the core workflow: create a tag, assign it to a GameObject, and check it from Game Creator 2.
By the end, you will have a simple Character.State.Stunned tag that can be added, removed, and checked at runtime.
#Requirements
| Requirement | Status |
|---|---|
| Unity | Tested in this workspace with Unity 6000.3.4f1. |
| Game Creator 2 | Game Creator 2 Core is required. |
| Minimum Unity version | TODO: Verify the minimum supported Unity version. |
| Minimum Game Creator 2 version | TODO: Verify the minimum supported Game Creator 2 version. |
#Installation
- Import Gameplay Tags for Game Creator 2 into your Unity project.
- Confirm Game Creator 2 Core is installed and compiling.
- Wait for Unity to finish importing and compiling scripts.
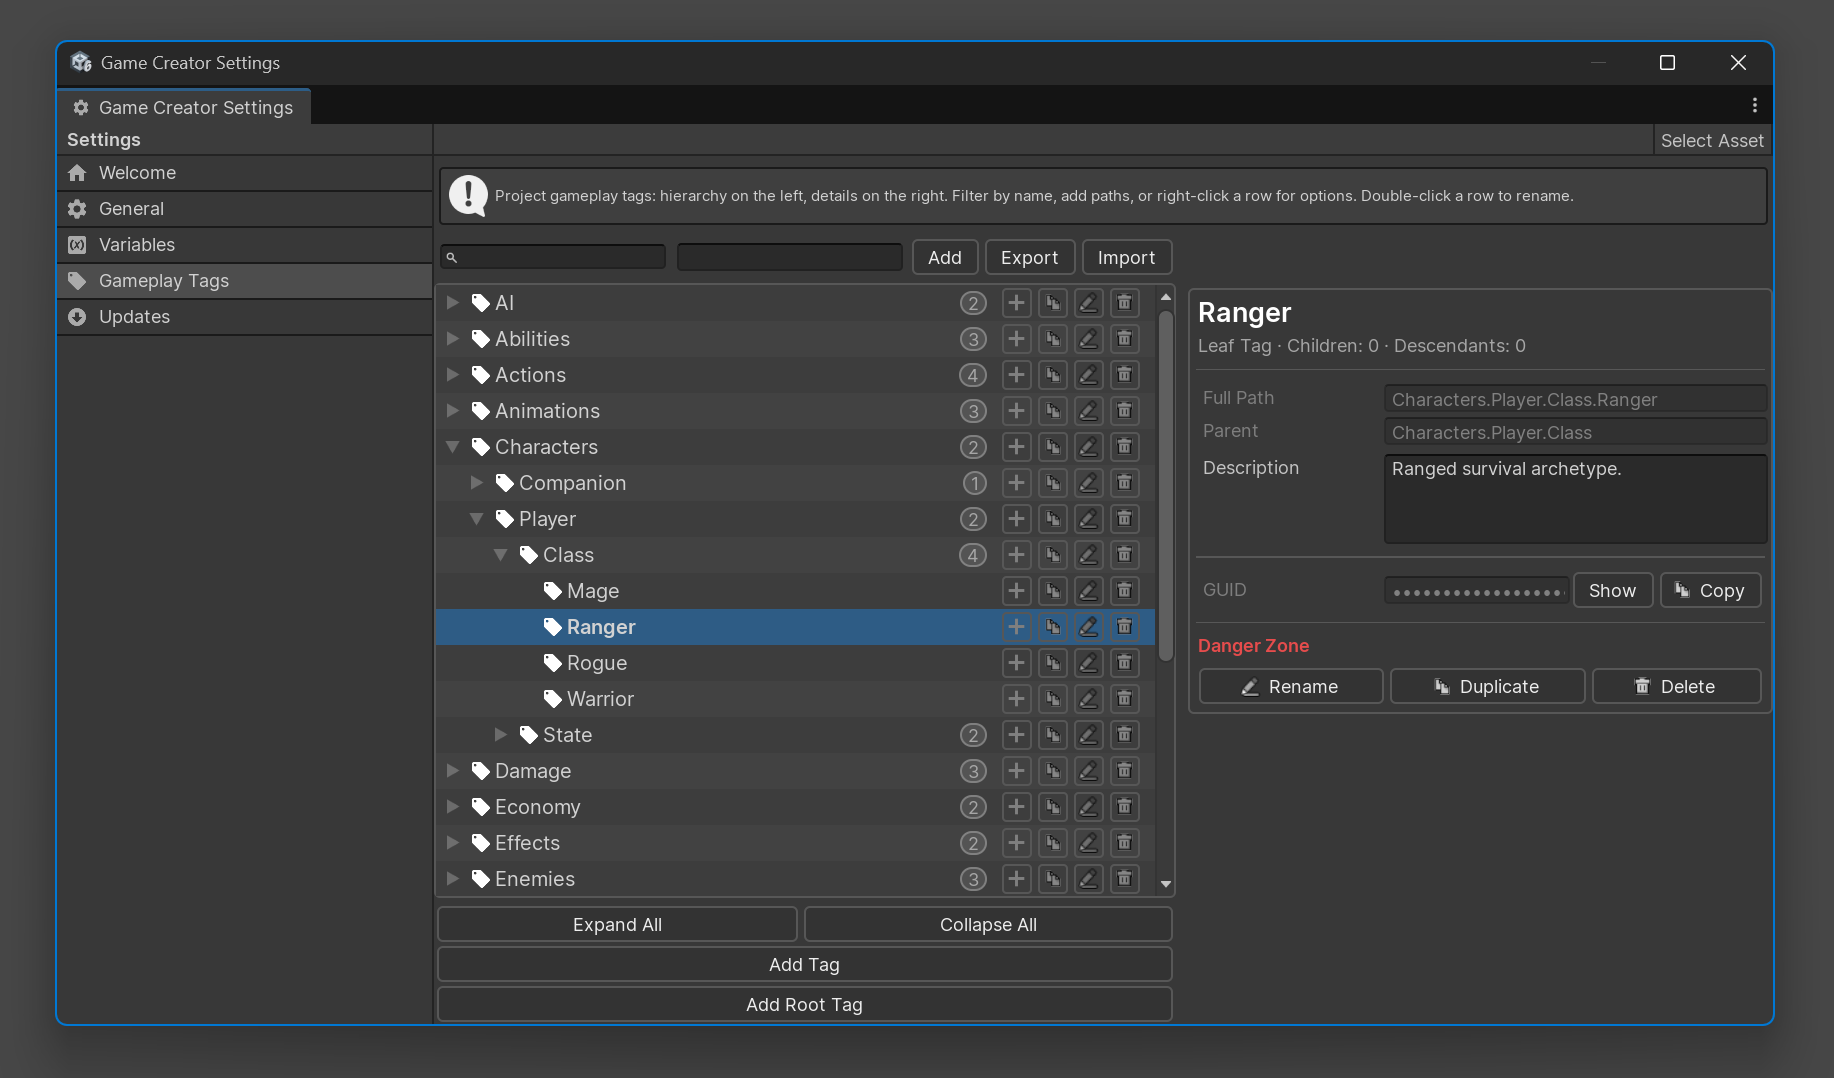
- Open Game Creator settings and select Gameplay Tags.
Note
The plugin stores project tags in a central Gameplay Tags repository. Inspectors, Game Creator fields, tag pickers, Actions, Conditions, Events, and runtime code all read from this database.
#Create Your First Tag
Start with a practical state tag:
Character.State.Stunned
In the Gameplay Tags settings page:
- Click Add Root Tag and create
Character. - Select
Characterand create a child tag namedState. - Select
Character.Stateand create a child tag namedStunned. - Select the final tag and add a short description:
Applied while a character cannot move, attack, or interact.
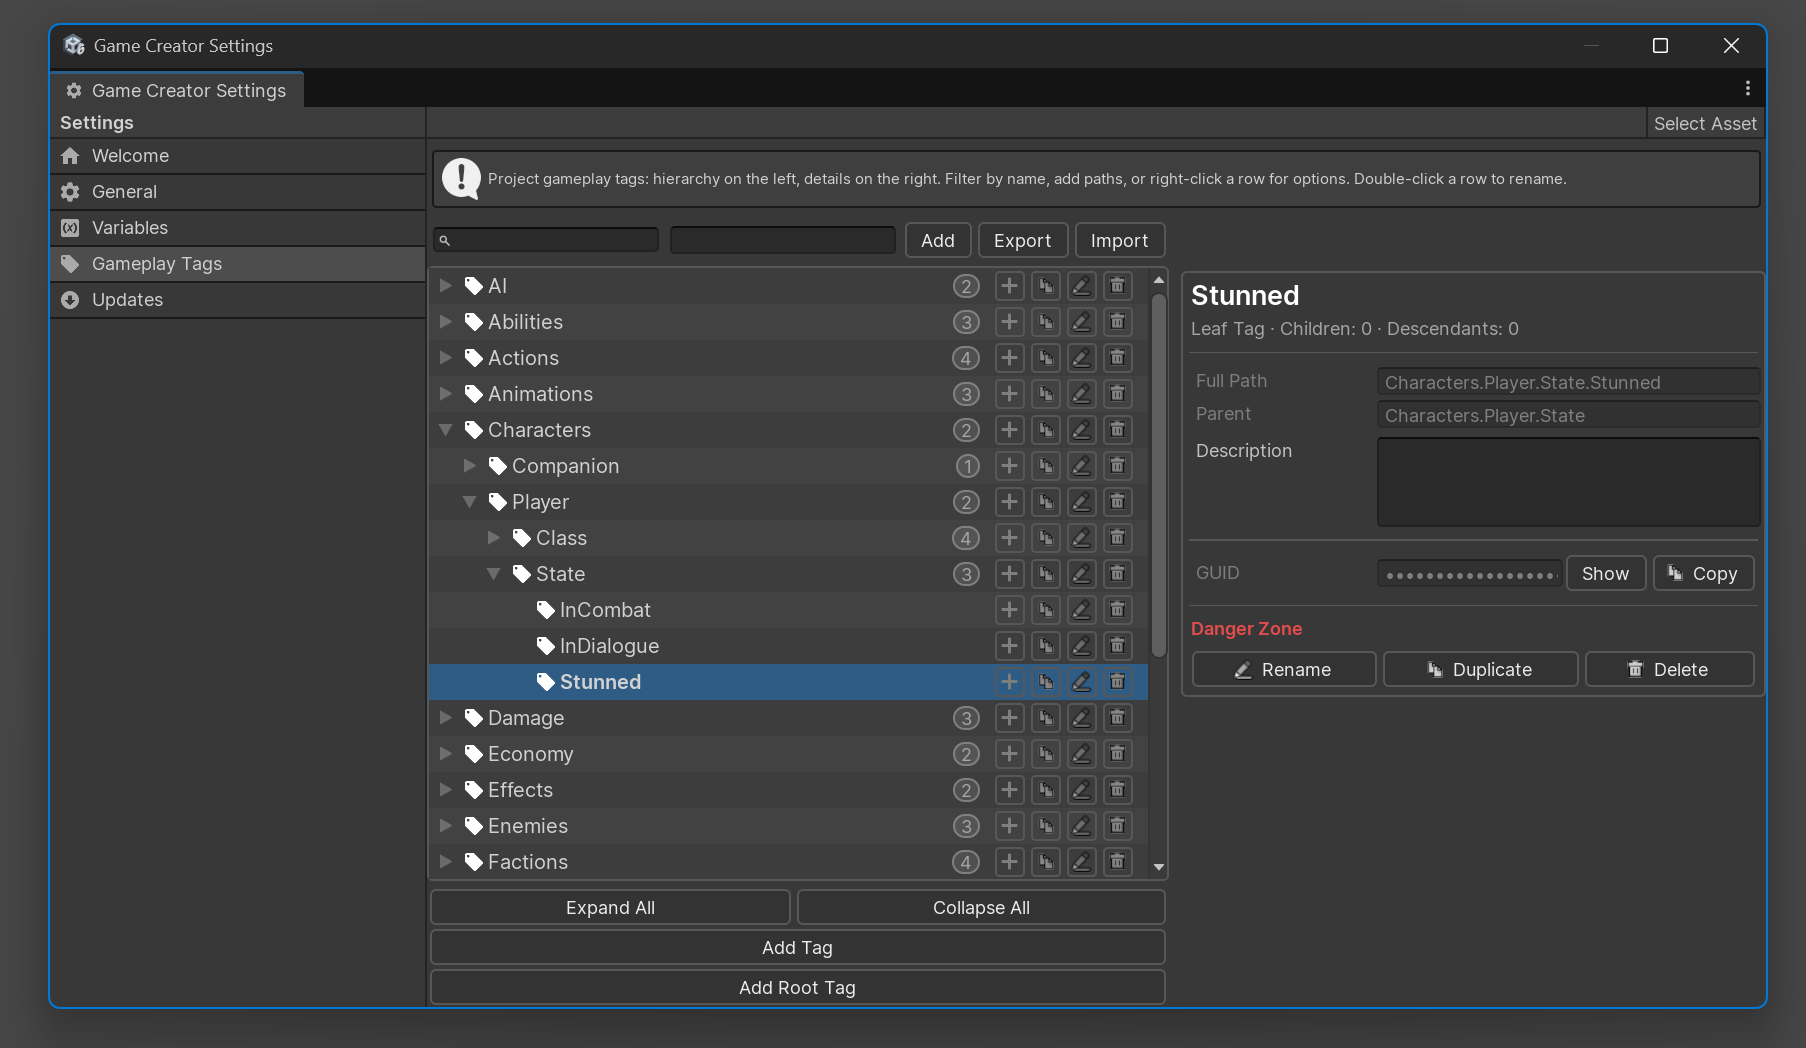
This structure gives you both a specific tag and a useful parent category:
| Tag | Use |
|---|---|
Character |
Broad character-related category. |
Character.State |
All gameplay state tags for characters. |
Character.State.Stunned |
Specific stunned state. |
#Add Tags to a GameObject
- Select a player, enemy, or test GameObject.
- Add Game Creator > Gameplay Tags > Gameplay Tag Component.
- Add
Character.State.Stunnedusing the tag picker.
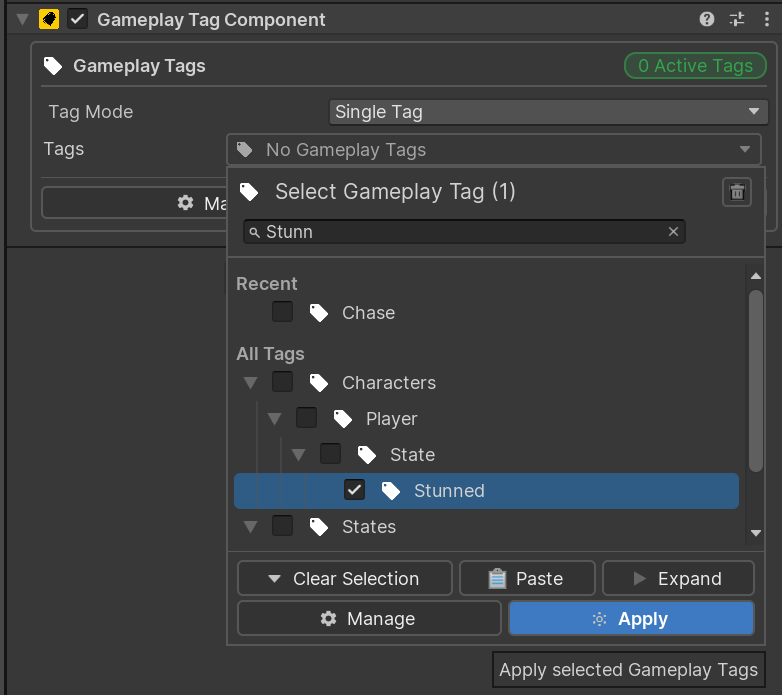
The GameplayTagComponent makes a GameObject visible to Gameplay Tag Actions, Conditions, Events, and runtime scripts.
Tip
PutGameplayTagComponenton prefabs that represent gameplay objects: characters, enemies, interactables, pickups, doors, traps, or quest objects.
#Check the Tag in a Condition
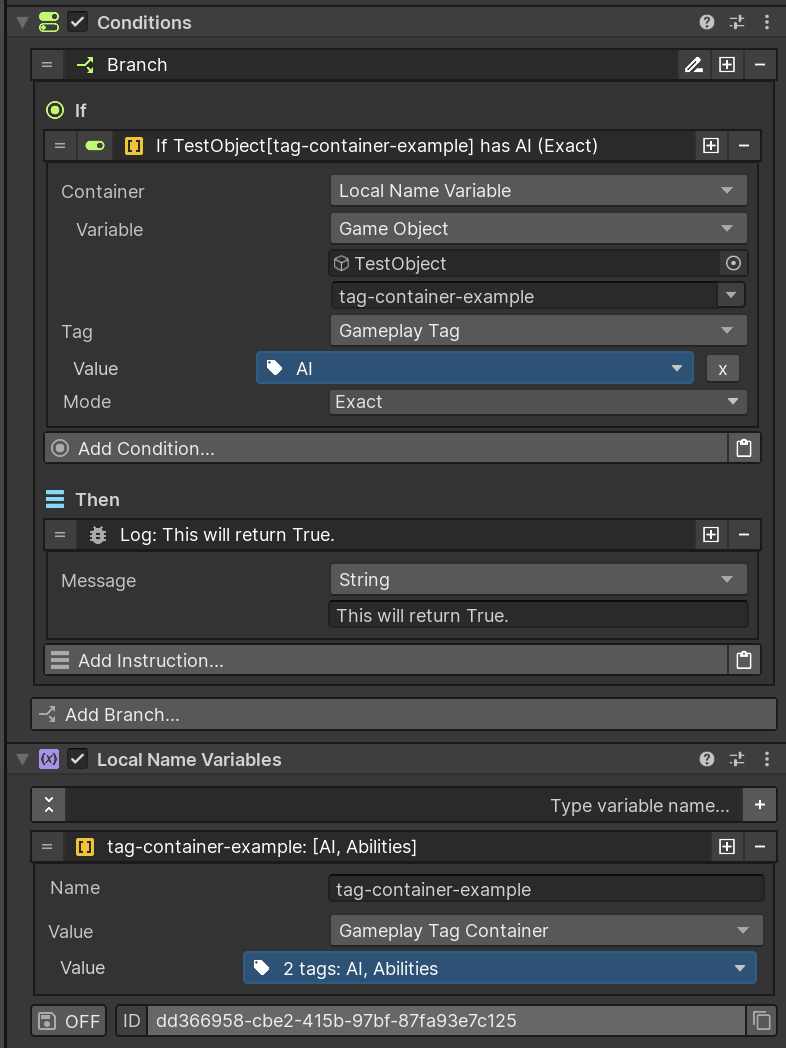
Use Game Object Has Gameplay Tag when you want to check a tagged GameObject directly.
- Add a Game Creator Condition.
- Choose Gameplay Tags > Game Object Has Gameplay Tag.
- Set Game Object to the object you want to check.
- Set Tag to
Character.State.Stunned. - Set Mode to
Exact.
The Condition returns true only when the object has that exact tag.
#Use Parent Matching
Parent matching lets one broad query match several specific states.
Example owned tag:
Character.State.Stunned
Query:
Character.State
Mode:
Include Children
Result:
true
This is useful when logic should respond to any state under a category, such as stunned, burning, frozen, silenced, or dead.
#Beginner Workflow: Stun State
Use this as a first real project workflow.
- Create
Character.State.Stunned. - Add
GameplayTagComponentto the player or enemy prefab. - When a stun effect begins, run Add Gameplay Tag and add
Character.State.Stunned. - In movement, attack, and interaction logic, use Game Object Has Gameplay Tag to block actions while stunned.
- When the stun expires, run Remove Gameplay Tag.
#Next Steps
- Read Gameplay Tags Overview to understand hierarchy and matching.
- Read Tag Manager to organize your project database.
- Read Game Creator Actions and Game Creator Conditions for visual scripting workflows.